Nail art is no longer just a salon luxury. With the right tools and a bit of patience, anyone can create stunning DIY nail designs right at home.
This blog post is dedicated to all the DIY enthusiasts who want to add a touch of creativity to their nails. We’ll explore six simple yet stunning DIY nail designs perfect for beginners. Each design comes with an easy-to-follow step-by-step tutorial, ensuring you can replicate these looks with ease.
1. Polka Dots Paradise

What You Need: Two nail polish colors of your choice, a toothpick or a dotting tool.
Steps:
- Apply a base coat of your chosen color.
- Dip the dotting tool or toothpick into the second color.
- Gently place dots on your nails.
- Seal with a top coat for longevity.
2. Striped Elegance

What You Need: Two contrasting nail polish colors, thin tape or nail strips.
Steps:
- Paint your nails with the base color.
- After it dries, apply thin strips of tape in parallel lines.
- Apply the second color over the tape.
- Remove the tape gently to reveal clean stripes.
3. Glitter Gradient

What You Need: Base color, glitter nail polish.
Steps:
- Apply the base color.
- Add glitter polish, starting at the tip and fading towards the middle.
4. Classic French Manicure

What You Need: Nude base coat, white polish, sticky notes or French tip nail stamp.
Steps:
- Apply the nude base.
- Use the edge of a sticky note to create a smooth curve. Paint the tips with white polish.
- If you’re using the French tip nail stamp, brush the stamper using the color polish to add to the nail tip. Then put your nail on the edge of the stamper gel polish. Lastly, press vertically to get classic French nails.
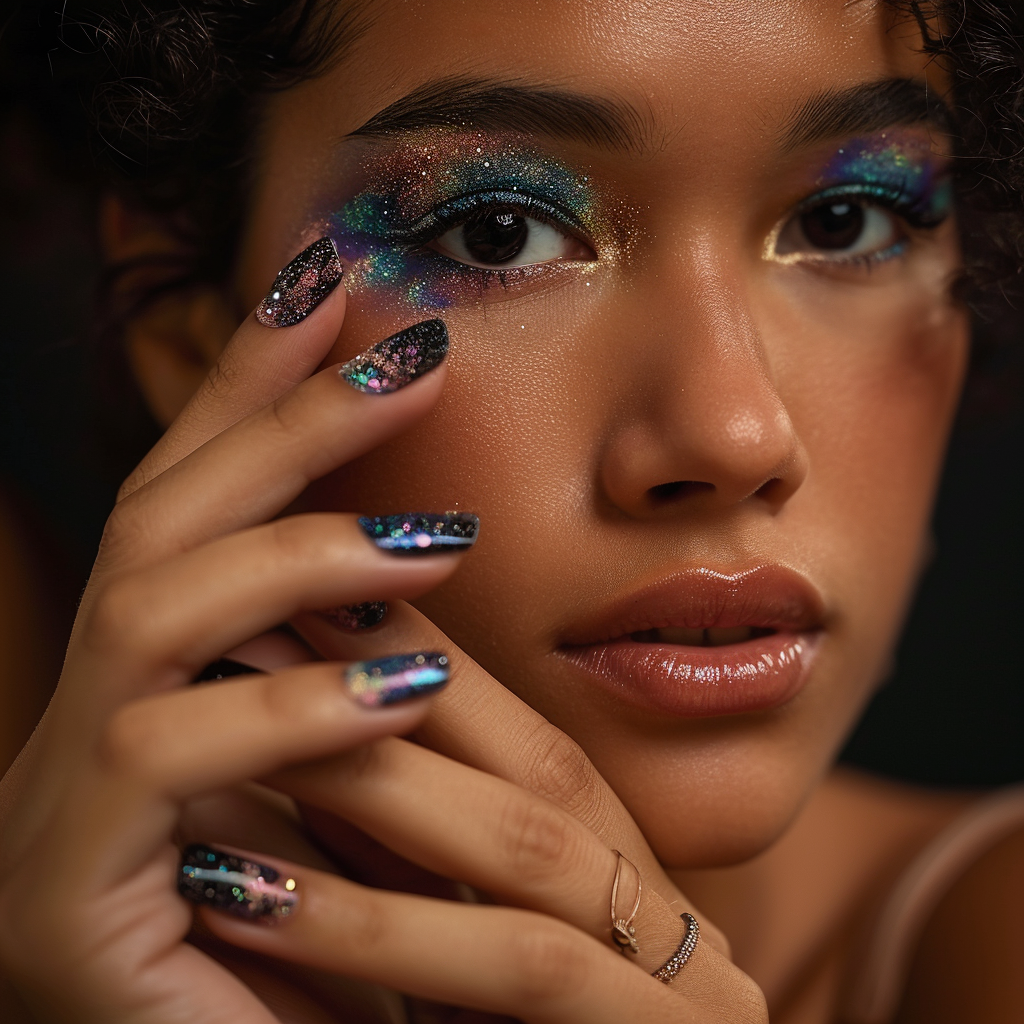
5. Galaxy Nails

What You Need: Black polish, sponge, glitter, and multiple bright colors.
Steps:
6. Ombre Effect

What You Need: Two complementary colors, a nail sponge or brush.
Steps:
- Apply the lighter color as a base.
- Apply both colors on a sponge, slightly overlapping.
- Dab onto the nails, blending the colors.
Whether you’re a beginner or just looking for new ideas, the DIY nail designs are sure to spark your creativity and enhance your DIY nail art skills. Remember, practice makes perfect, so don’t hesitate to experiment with colors and patterns. Happy painting!
#DIYNailArt, #NailDesignsForBeginners, #EasyNailArt, #HomeManicure, #CreativeNails, #NailArtTutorial, #NailPolishIdeas, #SimpleNailDesigns, #NailArtDIY, #FashionableNails